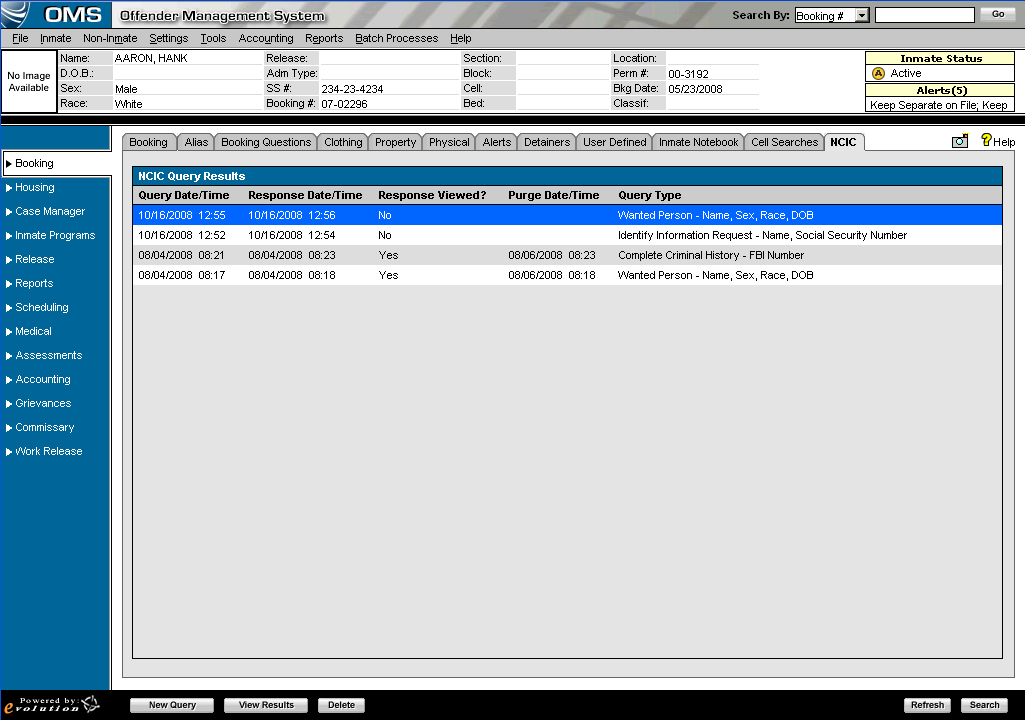
To run a NCIC query, select an inmate and navigate to the Booking->NCIC Queries tab.
Using this module it is possible to start a New Query, View Results of previous queries, Add, Edit, and/or Delete Notified Agencies Log records, Purge a Query Response from NCIC, and Delete a NCIC record.
Click the New Query button. Clicking this button will load the Query Information page.

Select a Query Purpose by marking one of the radio buttons. By default, both radio buttons will be unchecked.
Select a value from the Query Type dropdown. This dropdown contains the various types of queries that NCIC will accept. The values in the dropdown vary per facility/state and must be configured during system install.
The values under Inmate Identifiers vary based on the Query Type selected. No fields should be displayed until the user selects a value from the Query Type dropdown. The fields under Inmate Identifiers should be read-only and should pull their values from the necessary fields in OMS. These read-only fields are displayed with the values submitted in the NCIC Query.
Click the Submit Query button to submit the query to NCIC. Clicking this button returns the program to the NCIC Queries browse page.
Click the Cancel button abandon the query and return to the NCIC Queries browse page.
Once a query is submitted, click the Refresh button to reload the NCIC Queries browse page.
A response message may take anywhere from a few seconds to several minutes. It is possible to navigate away from the page and come back if desired.
Note: Once a query has been submitted to NCIC it can not be edited or deleted. The response the facility receives from NCIC may either be manually deleted or the system can be setup to automatically purge messages after “X” hours.
Double-click a row in the NCIC Query Results browse window, or select a row from the browse window and click the View Results button. Either action leads to the NCIC Results page.
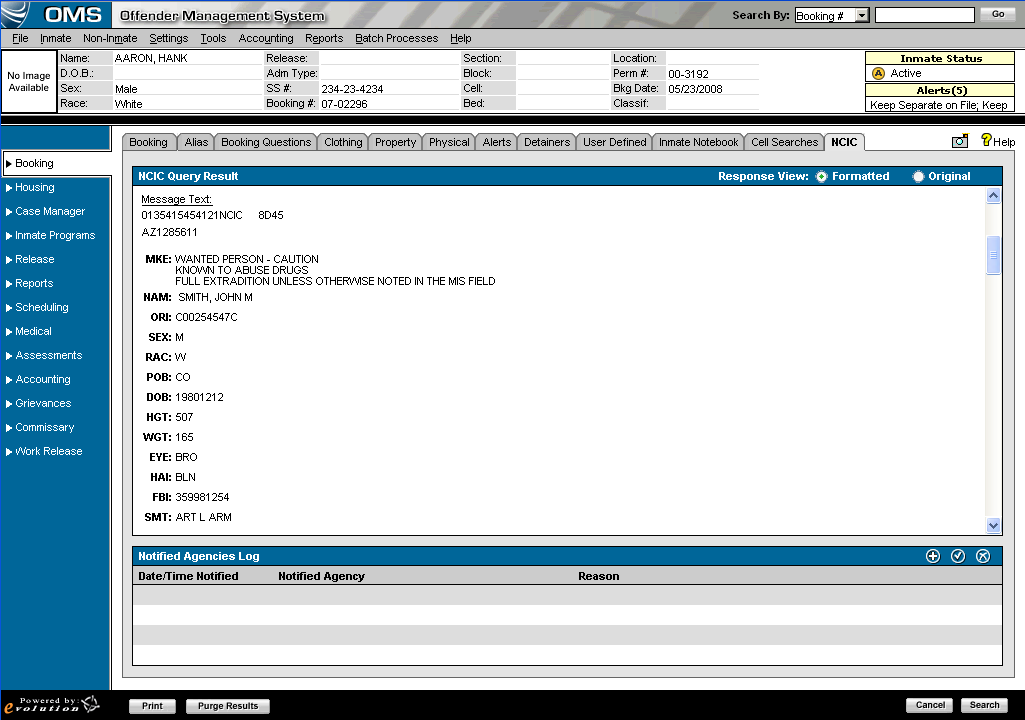
The response message sent back from NCIC is displayed in this window. The text is not editable.
Select the Formatted or Original view based on your facility's preferences. The default view is Formatted.
Print the response message by clicking the Print button. The printed response message is either Formatted or Original based on the selected radio box of Response View.
Click the Cancel button to return to the NCIC Browse page.
The Notified Agencies Log allows your facility to track agencies they have shared the response message with. This log is necessary in cases where the NCIC record is expunged and the facility must notify any agencies that now have this shared information.
It is the facility’s responsibility to record anyone outside of the facility that receives information sent from NCIC. The Notified Agencies Log allows your facility to record any agencies who received the NCIC information, when it was shared, and the reason it was shared.
Add
Click the Add icon in the Notified Agencies Log. Clicking this icon activates the Notification Information popup.
Enter a value for Date/Time Notified. This field defaults to the current date/time.
Select a value from the Notified Agency dropdown. This dropdown will contain values from the ARREST code table, but may also be entered manually for a value that does not exist in the code table.
Enter a value for Reason.
Click the Save button to save the notification record and close the Notification Information popup.
Click the Cancel button to cancel the addition of the notification record and close the Notification Information popup.
Edit
Select a record to edit from the Notified Agencies Log browse window by either double-clicking the record or selecting the record and clicking the Edit button. The Notification Information popup is activated.
Modify notification details as needed.
Click the Save button to save the notification record and close the Notification Information popup.
Click the Cancel button to cancel modifications to the notification record and close the Notification Information popup.
Delete
Select a record to edit from the Notified Agencies Log browse window.
Click the Delete button to activate a delete confirmation popup.
Click the Yes button in the confirmation popup to delete the record and close the popup.
Click the No button in the confirmation popup to keep the record and close the popup.
When a response message from NCIC is purged, the response message is removed from the system, but the parent record remains within OMS along with any agency notification records.
The response message can be manually purged or the system administrator can use a system parameter to automatically purge messages after "X" hours.
Purging the record ensures the most up-to-date information is utilized.
Double-click a row in the NCIC Query Results browse window, or select a row from the browse window and click the View Results button. Either action leads to the NCIC Results page.
Click the Purge Results button to activate the purge confirmation popup.
Click the Yes button to purge the response message, close the popup, and return to the NCIC browse page.
Click the No button to keep the response message, close the popup, and return to the NCIC browse page.
Deleting a NCIC record removes all information pertaining to the NCIC query, the response message, and any notified agency information.
Select a record in the NCIC Query Results browse window.
Click the Delete button to activate the delete confirmation popup.
Click the Yes button in the confirmation popup to delete the record and close the popup.
Click the No button in the confirmation popup to keep the record and close the popup.